Label images for machine learning
Labelling turns an image set into training data for an object detection model. You step through the photos and draw a box around each thing you want the model to learn to find, such as a caterpillar on a canola pod. When you have labelled enough images, you export your labels for your training tool.
Before you start
You need an asset set with JPEG or PNG photos in it. If you don't have one yet, see Upload your imagery.
To draw boxes, you need permission to edit assets in the project. Without it you can still step through the images and see the boxes, but you can't change them.
1. Open the labelling page
Open the project, go to Asset Sets, and open the asset set. Then click Label for ML at the right-hand end of the Imagery heading.
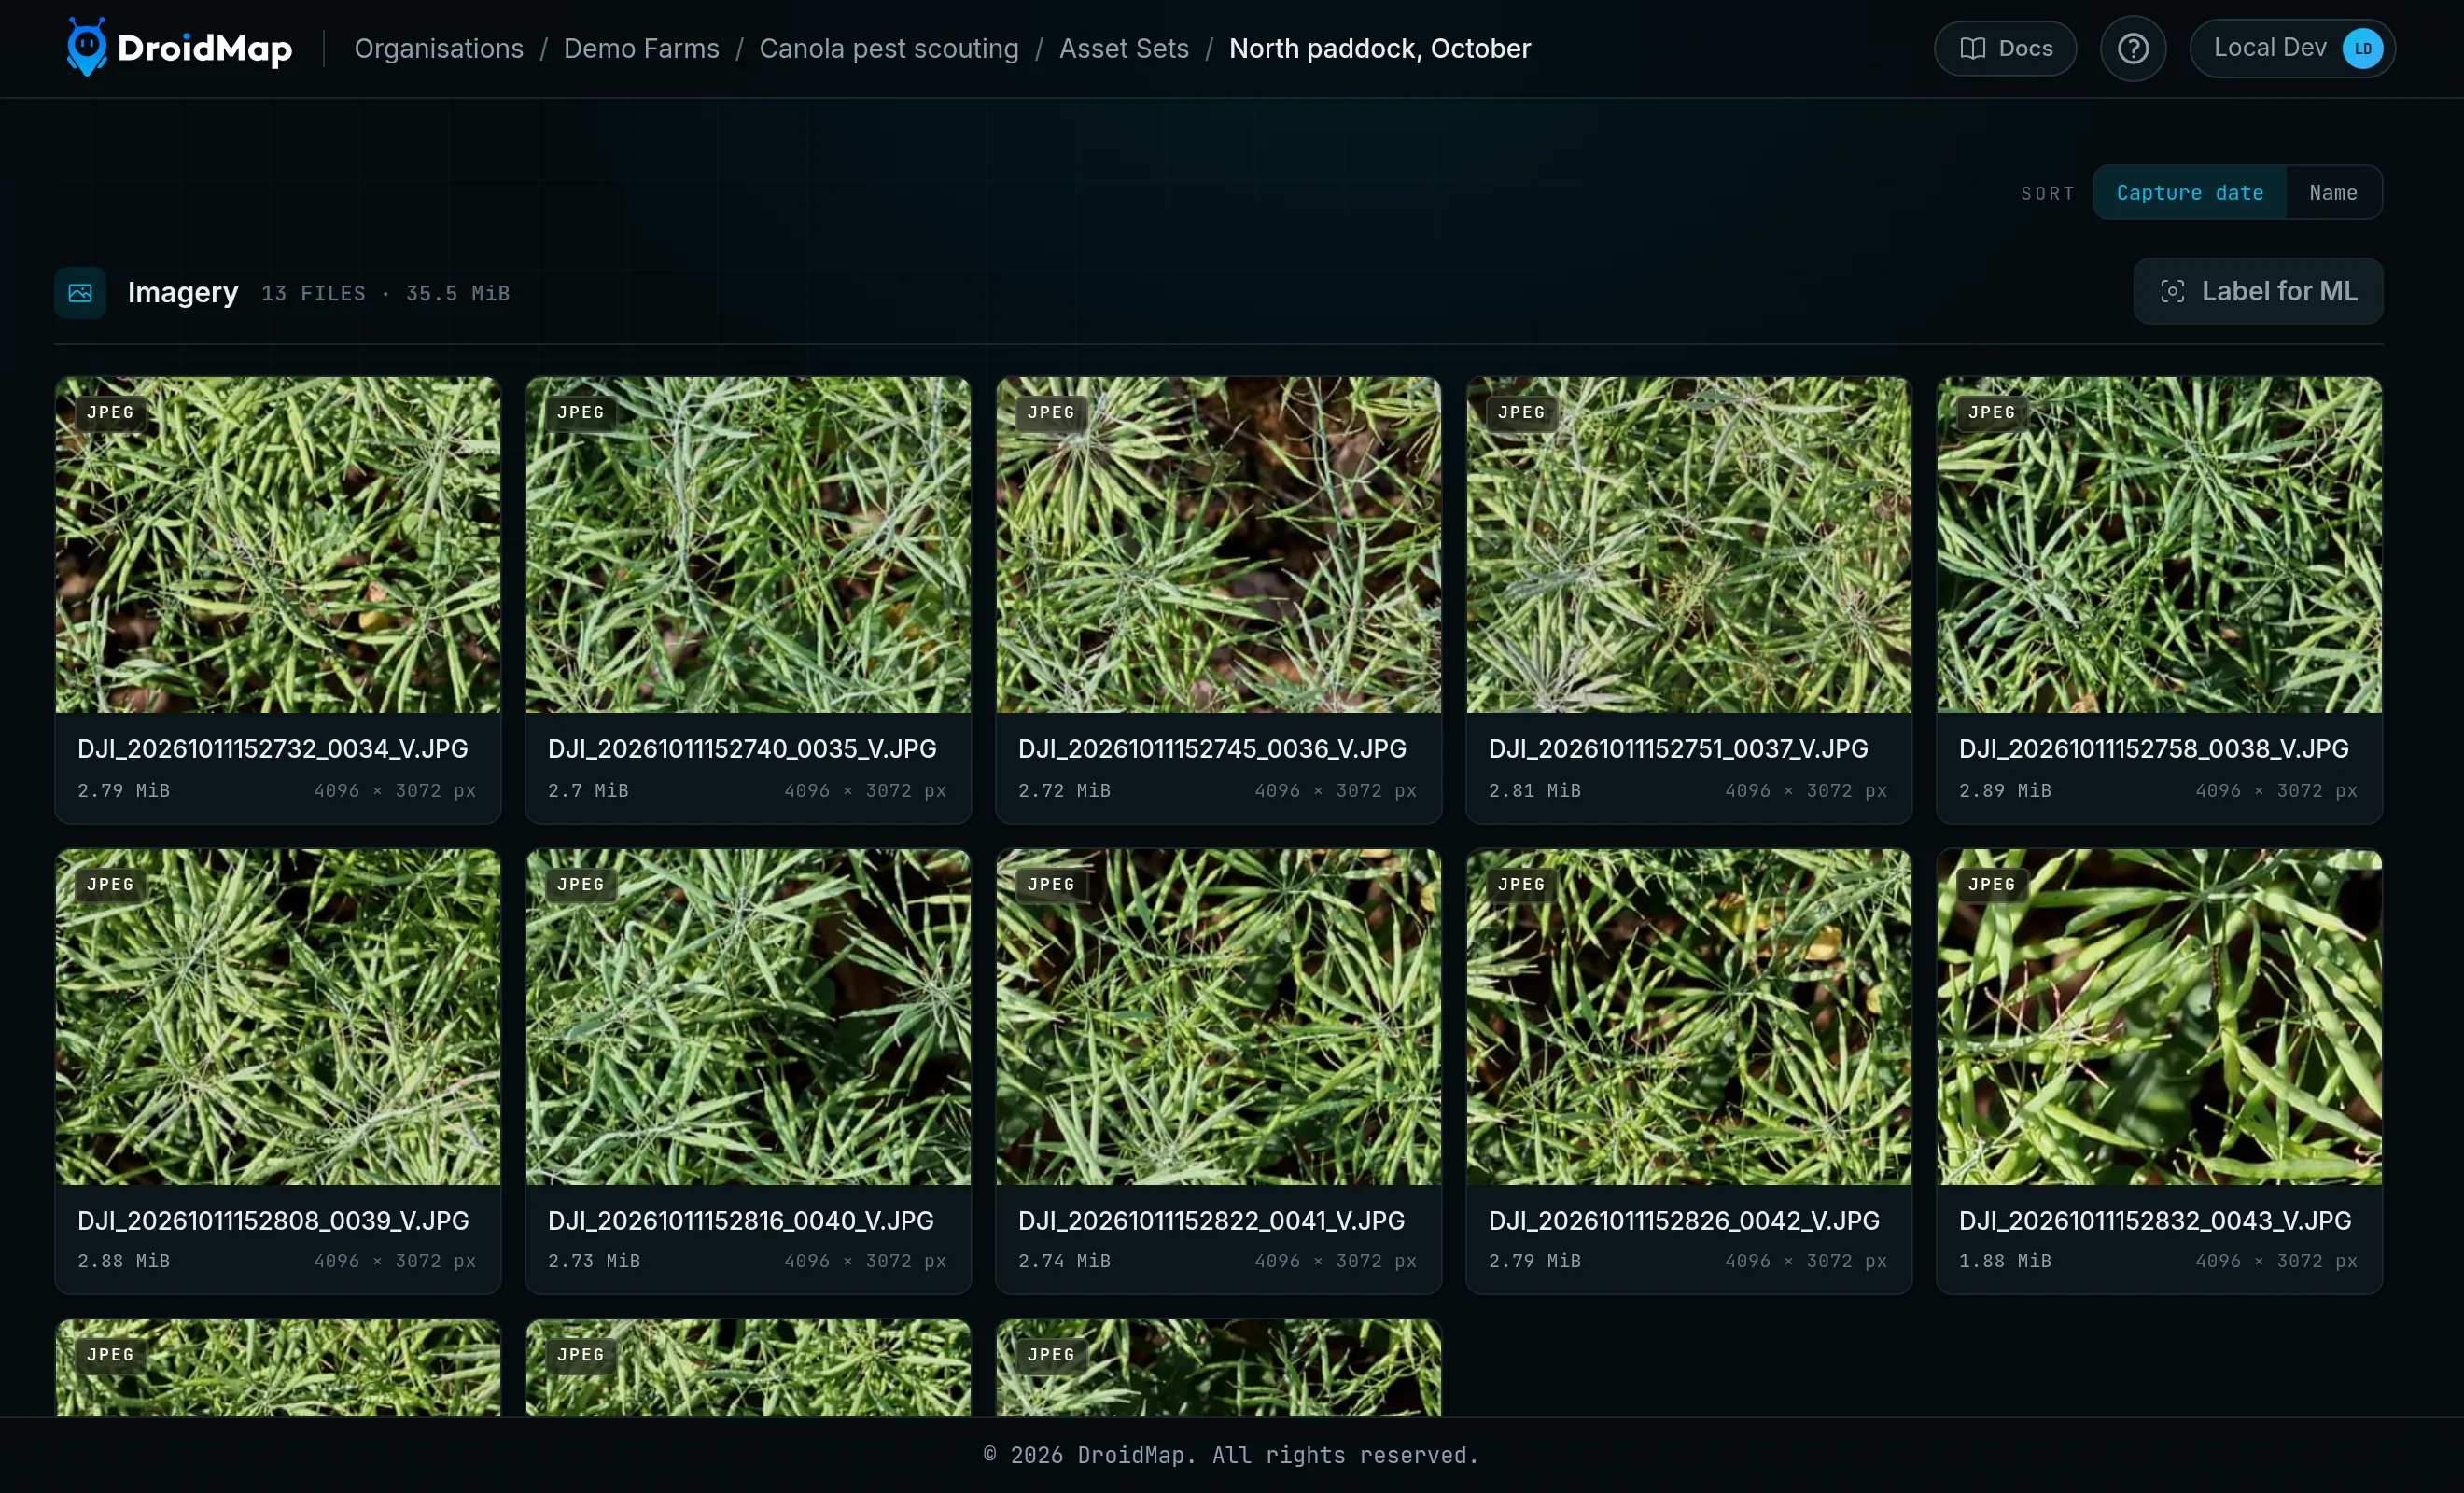
The button isn't shown on the outputs of a mapping job, because those are maps and models rather than source photos.
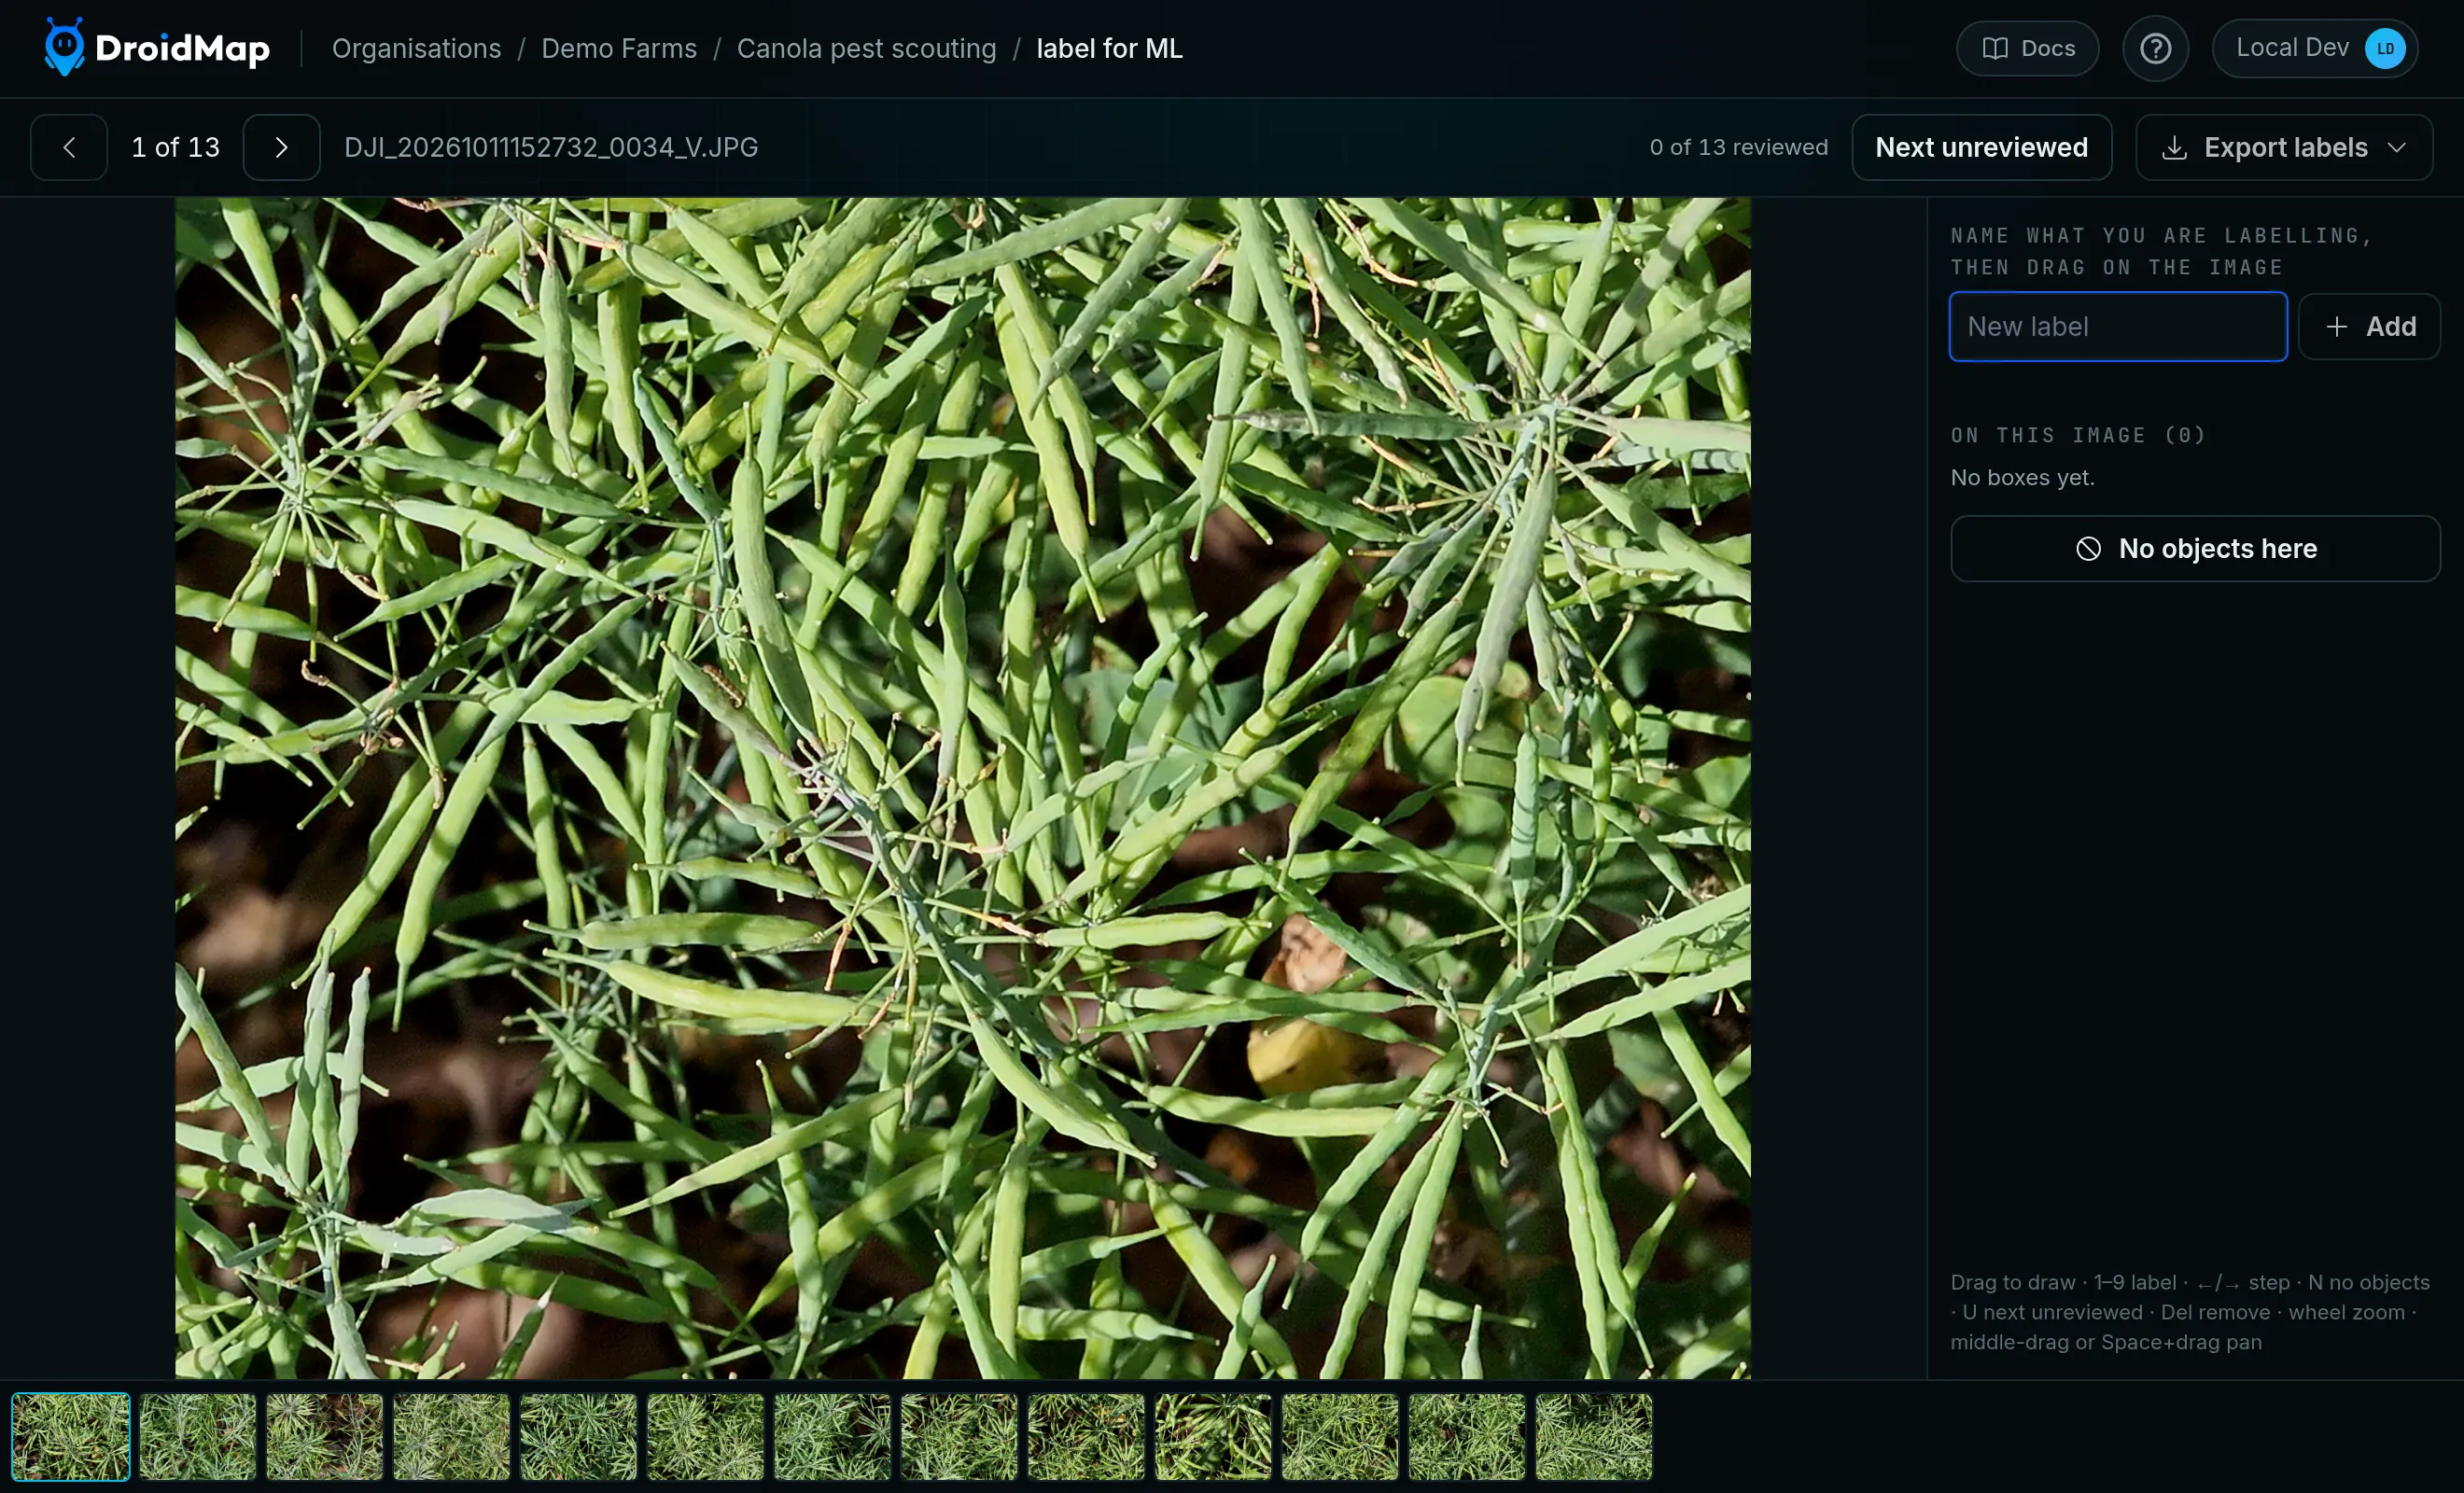
The page shows the photo in the middle, your labels on the right and a strip of every image along the bottom.
2. Add a label
A label is the name of what you are marking, such as Heliothis or Hole. Type it in the New label box, then click Add or press Enter. The label becomes the current one, shown next to Drawing: above the box.
Choose your label names carefully, because they become the class names your model learns. They must match exactly, so Hole and hole count as two different labels.
3. Draw a box
Drag on the photo from one corner of the object to the opposite corner. A dashed outline follows your pointer, and the box is saved as soon as you let go. There is no save button.
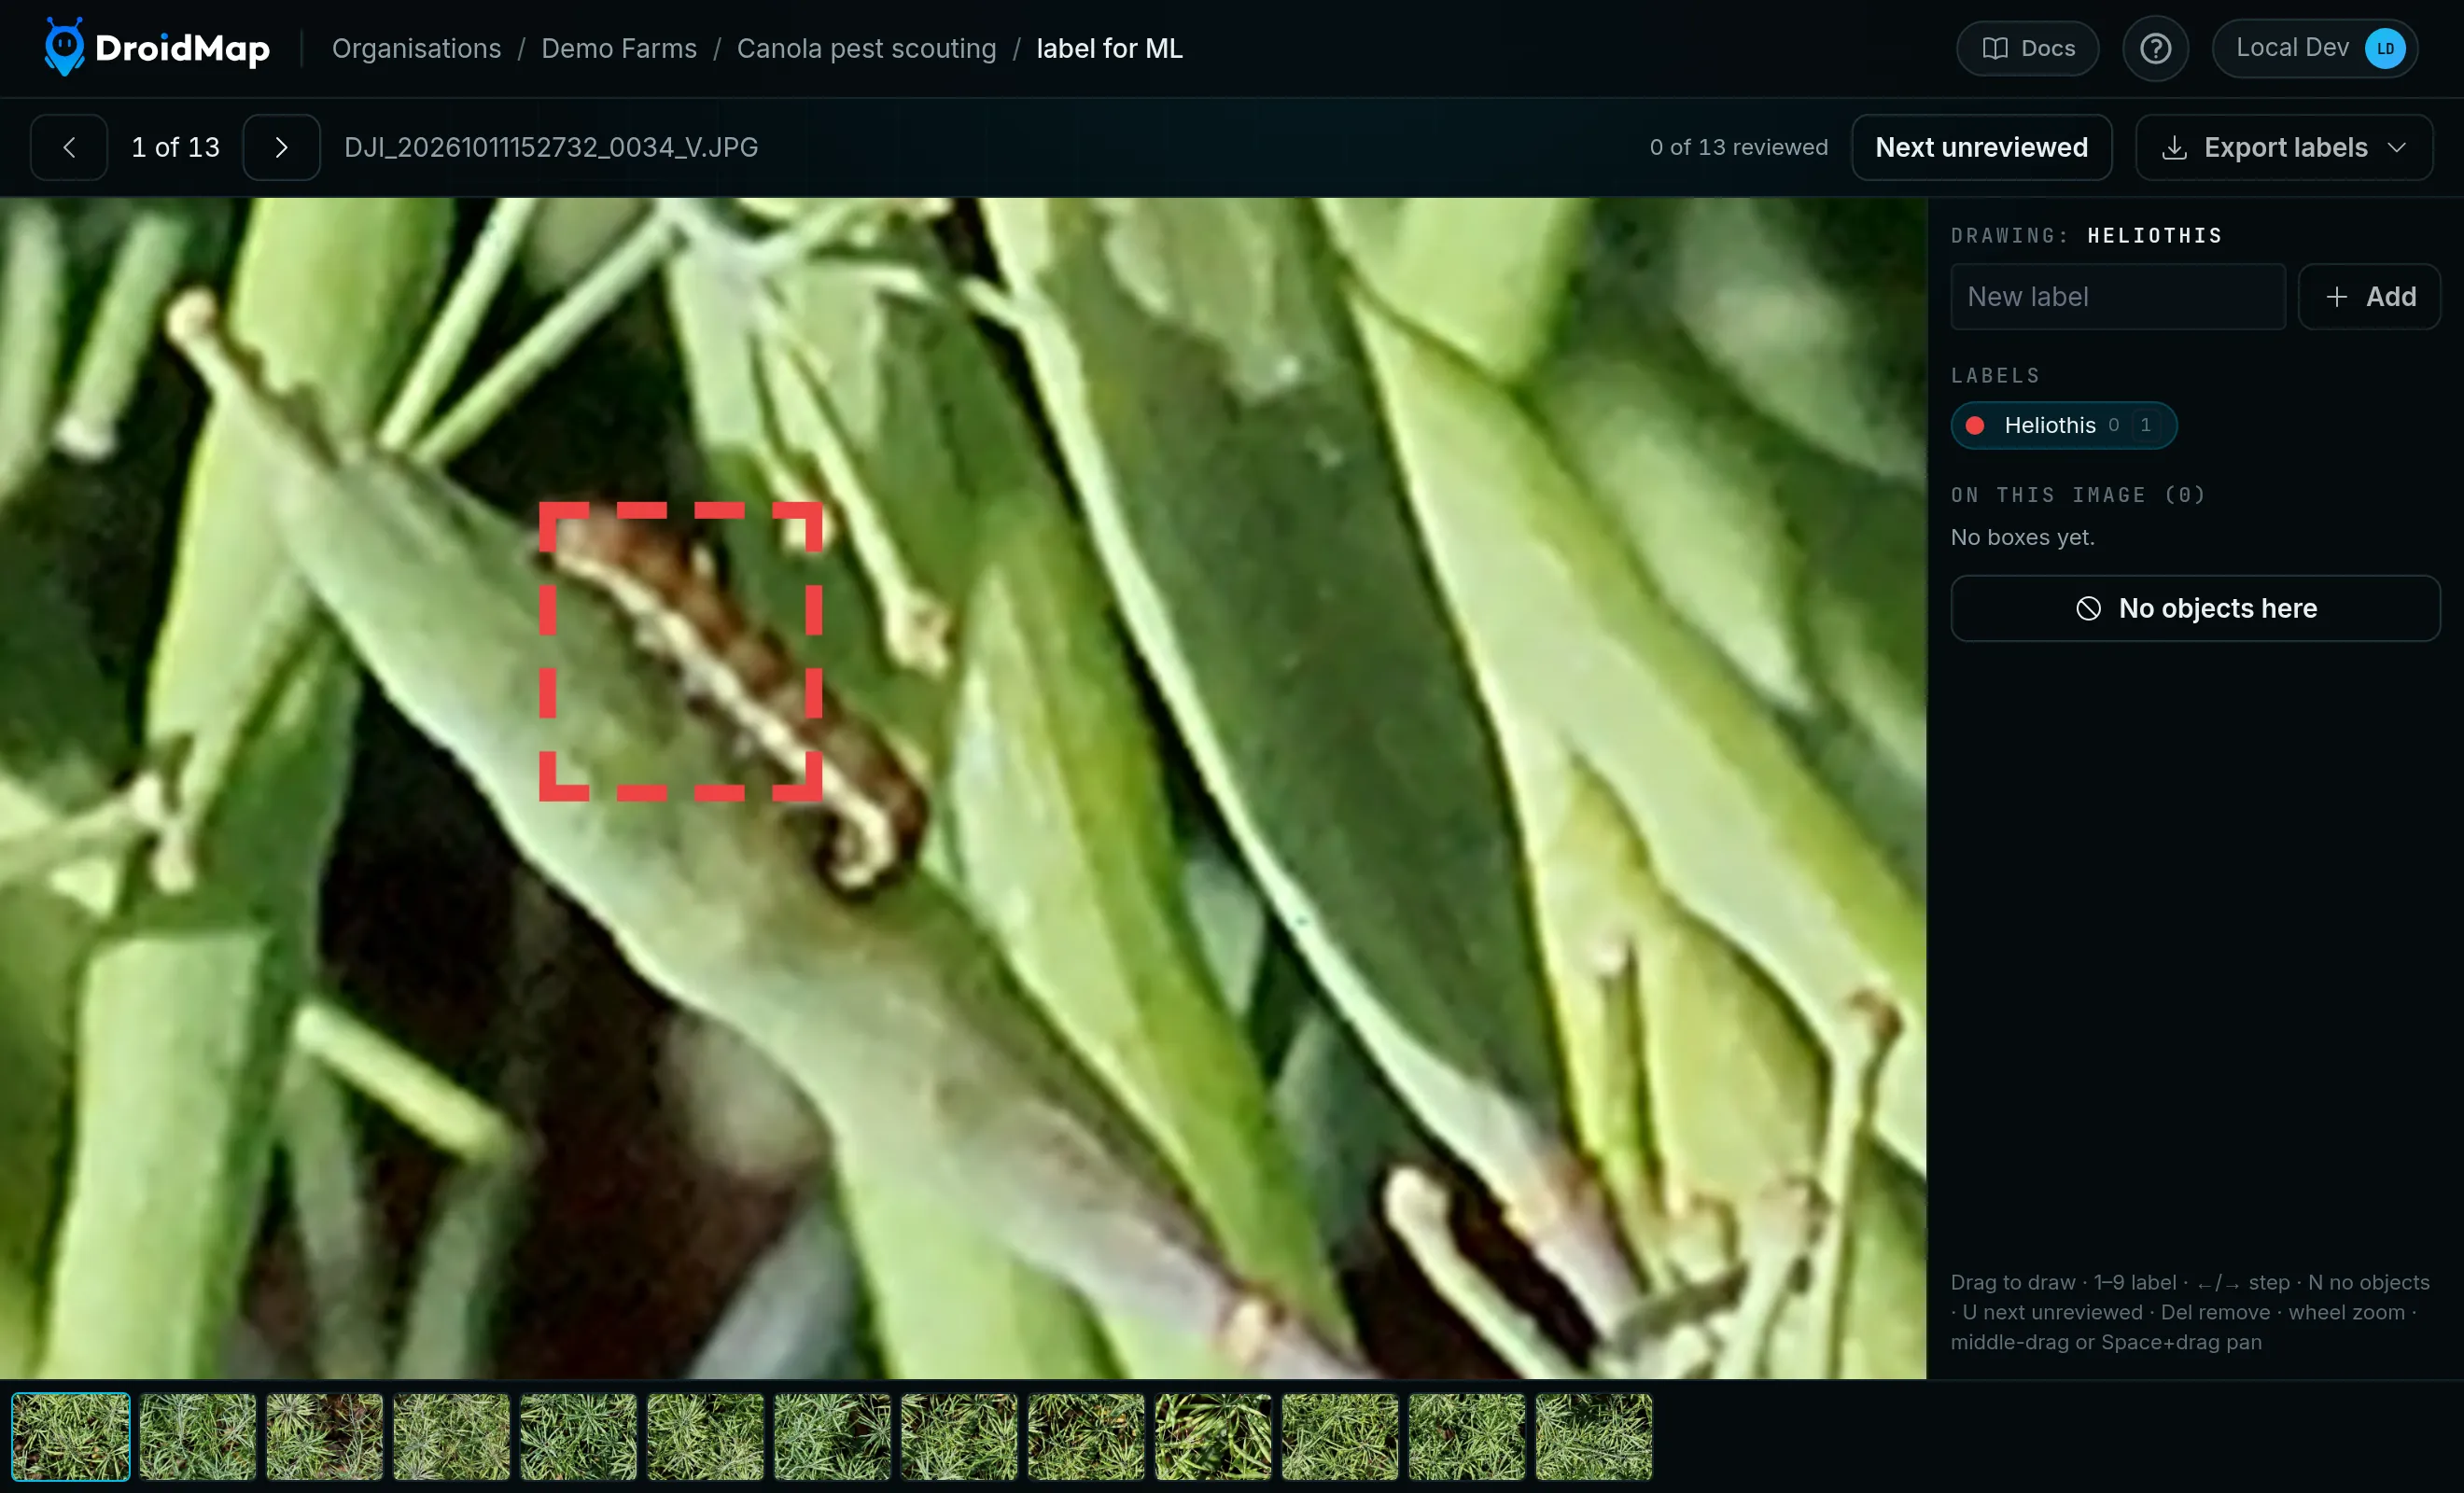
Draw the box as tightly around the object as you can, on every image. Consistent boxes train a better model.
For small objects, zoom in first. Very short drags are ignored, so that a stray click doesn't create a box, and a tiny object can fall under that limit when the whole photo is showing.
- Zoom: use the mouse wheel. The photo zooms around your pointer.
- Pan: hold the middle mouse button and drag, or hold Space and drag.
4. Label everything on the image
An image can have as many labels as it needs, up to 500 boxes. To change label, click another chip under Labels or press its number key. Each chip shows the number of boxes with that label across the whole set, followed by its number key.
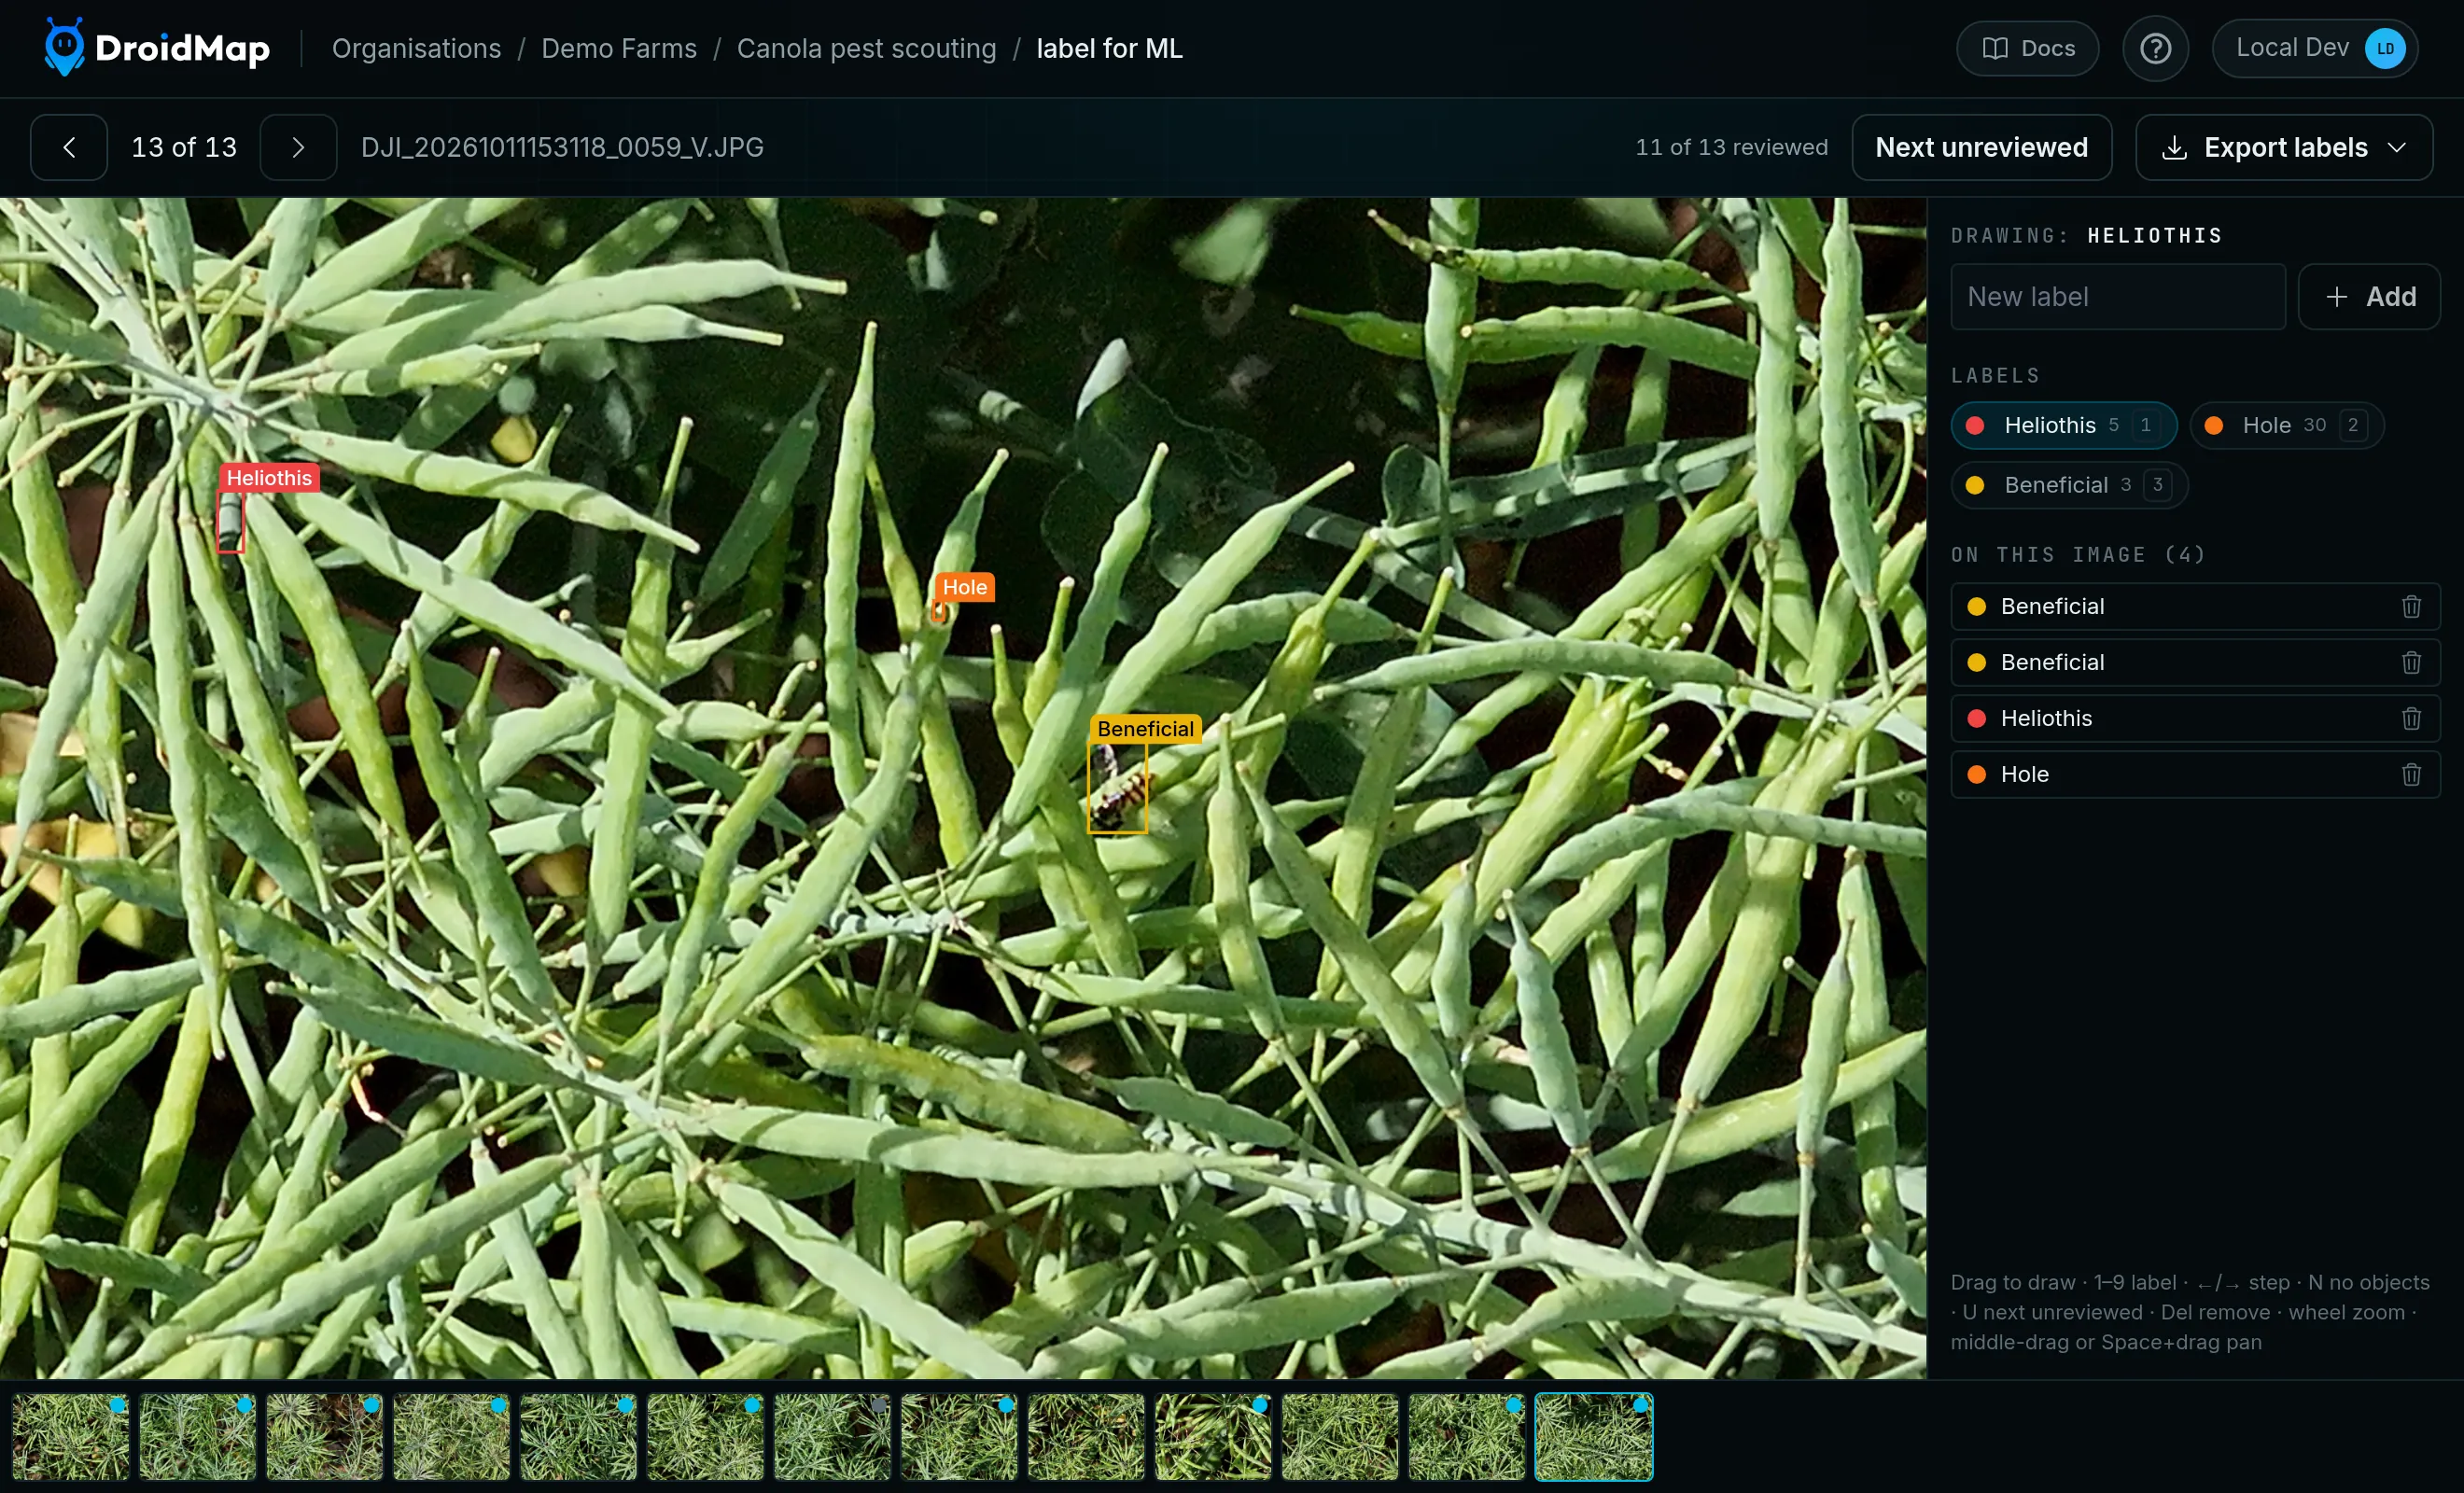
If an image has several objects, box all of them. A model treats anything you leave unboxed in a labelled image as background, so a missed caterpillar teaches it that caterpillars aren't worth finding.
5. Fix a box
Click a box to select it, or click its row under On this image. Handles appear around a selected box.
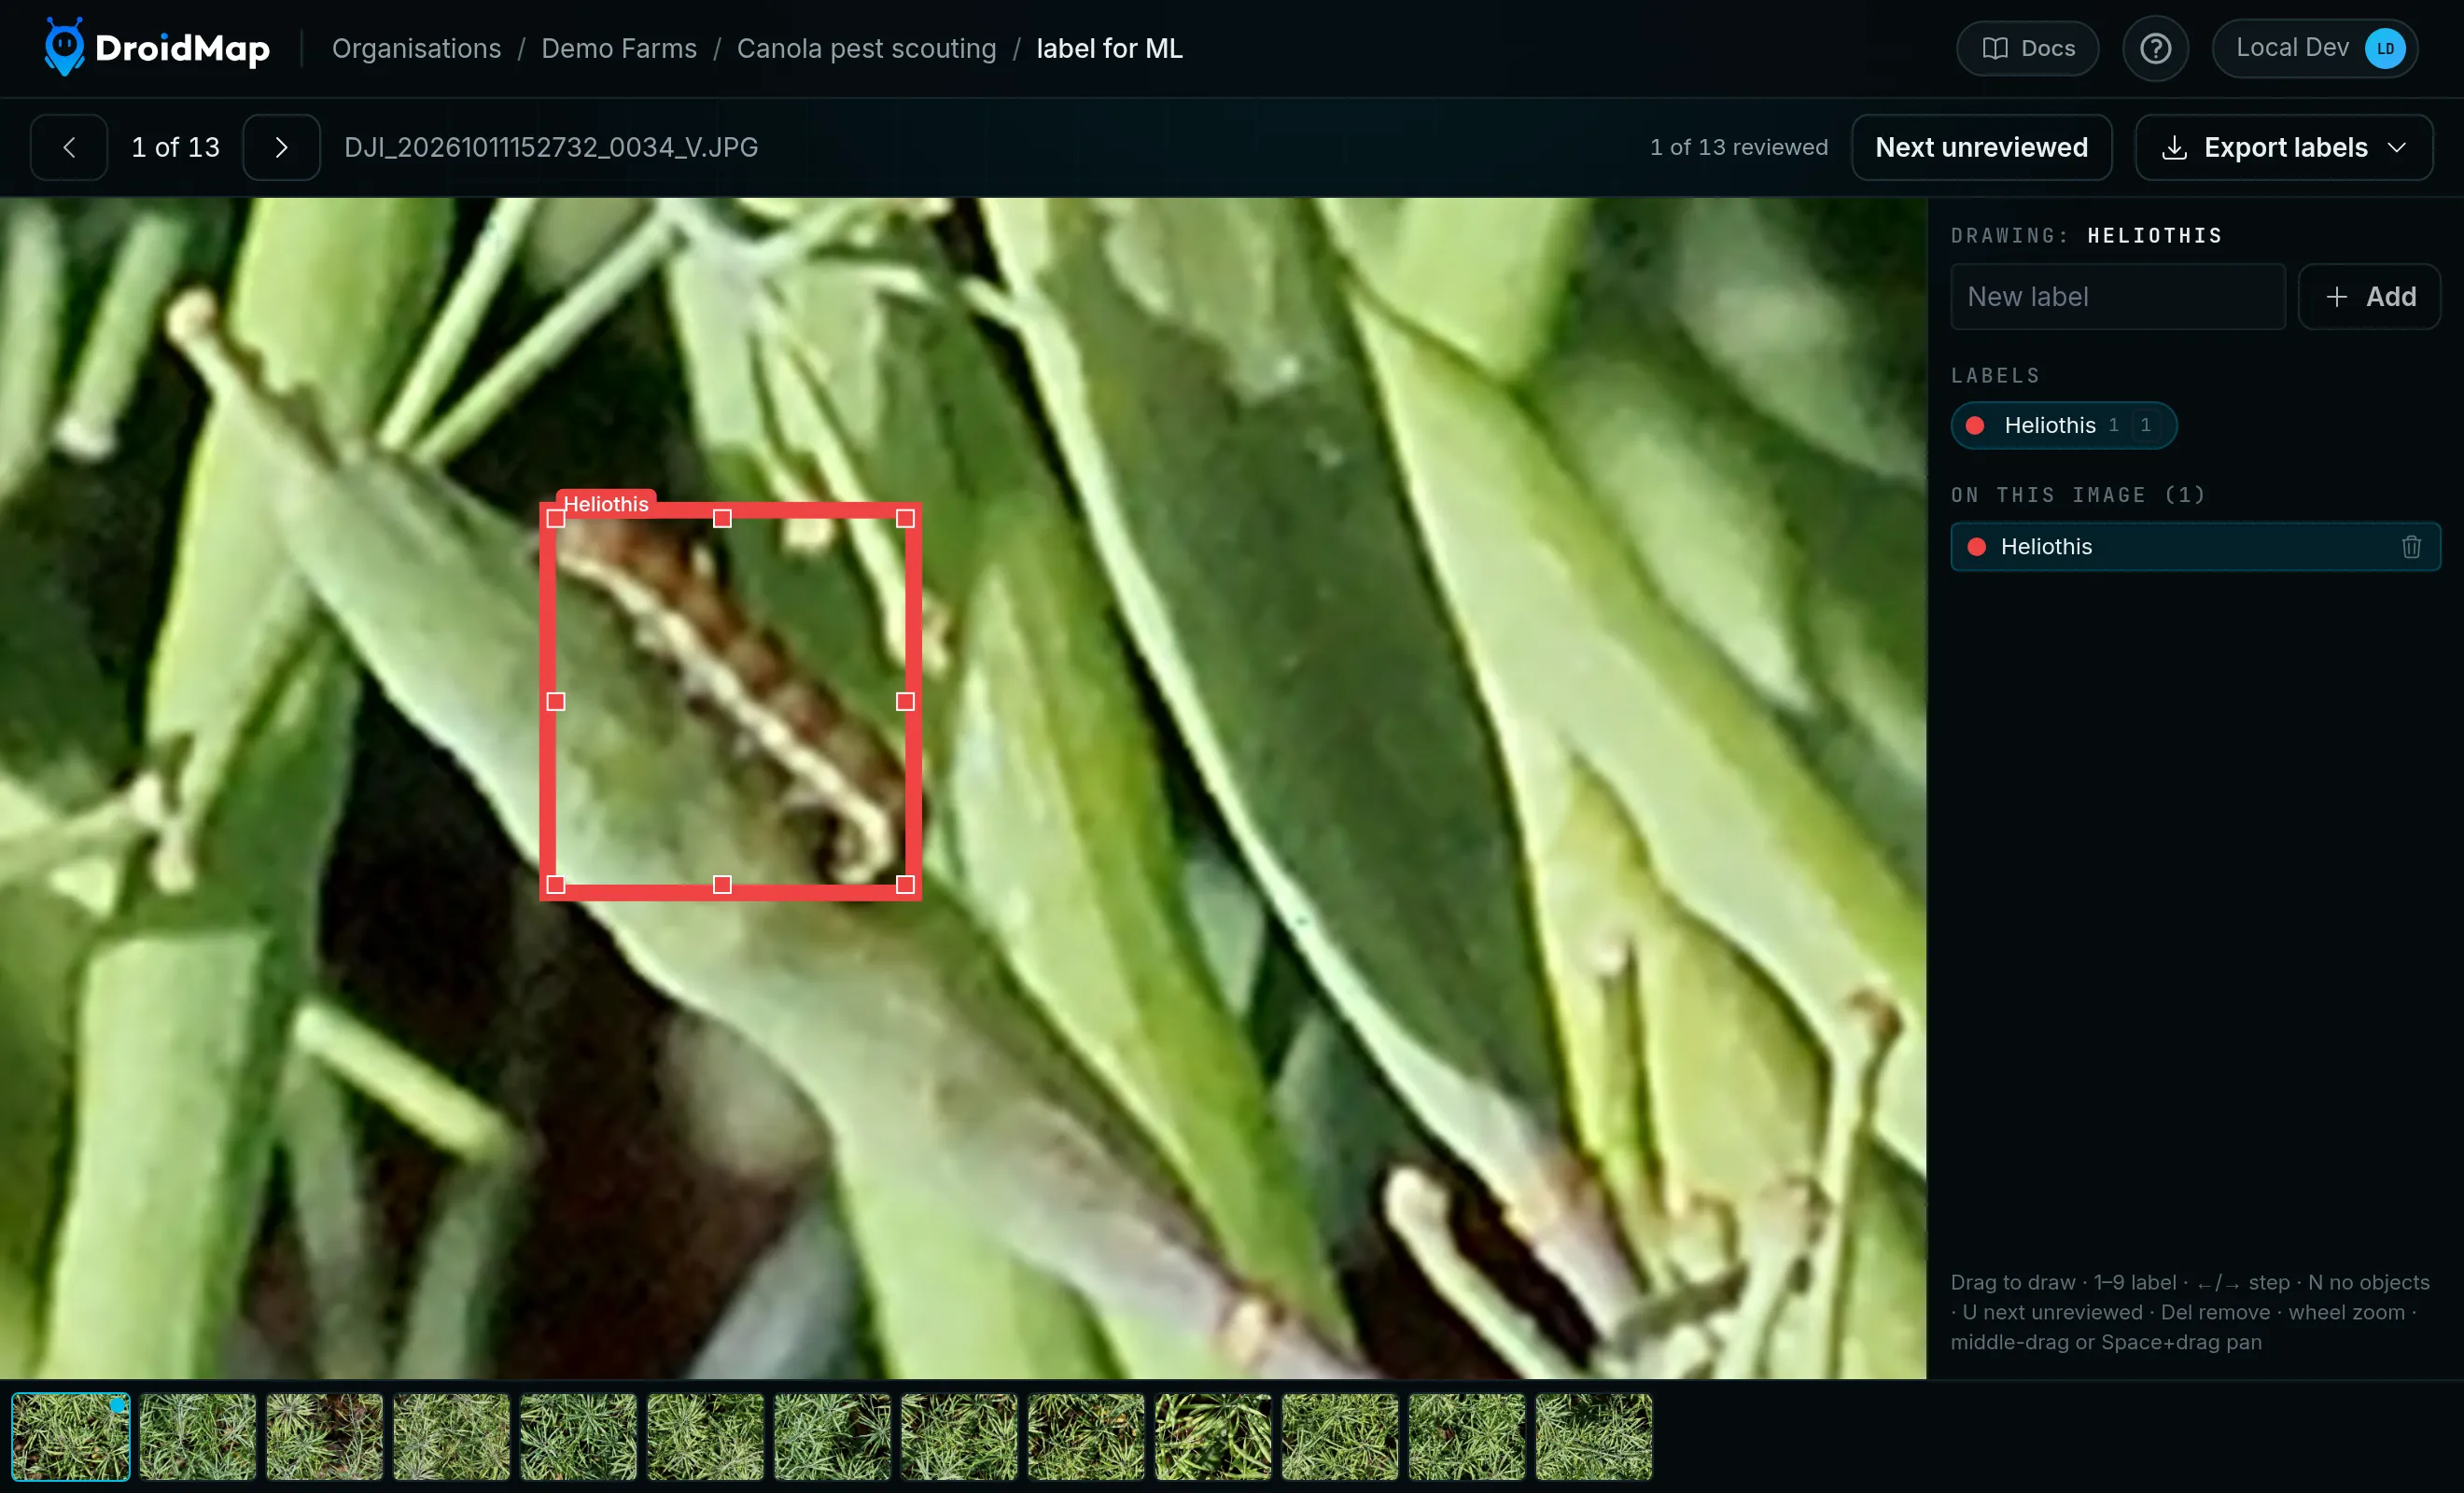
With a box selected, you can:
- Move it: drag the box.
- Resize it: drag one of its handles.
- Change its label: click another chip or press its number key.
- Delete it: press Delete or Backspace, or click the bin icon on its row. This happens straight away, with no confirmation, and can't be undone.
Press Escape or click an empty part of the photo to deselect it.
Tip: dragging from inside an existing box moves that box. To draw a new box that overlaps it, start dragging from outside it.
6. Mark images with nothing in them
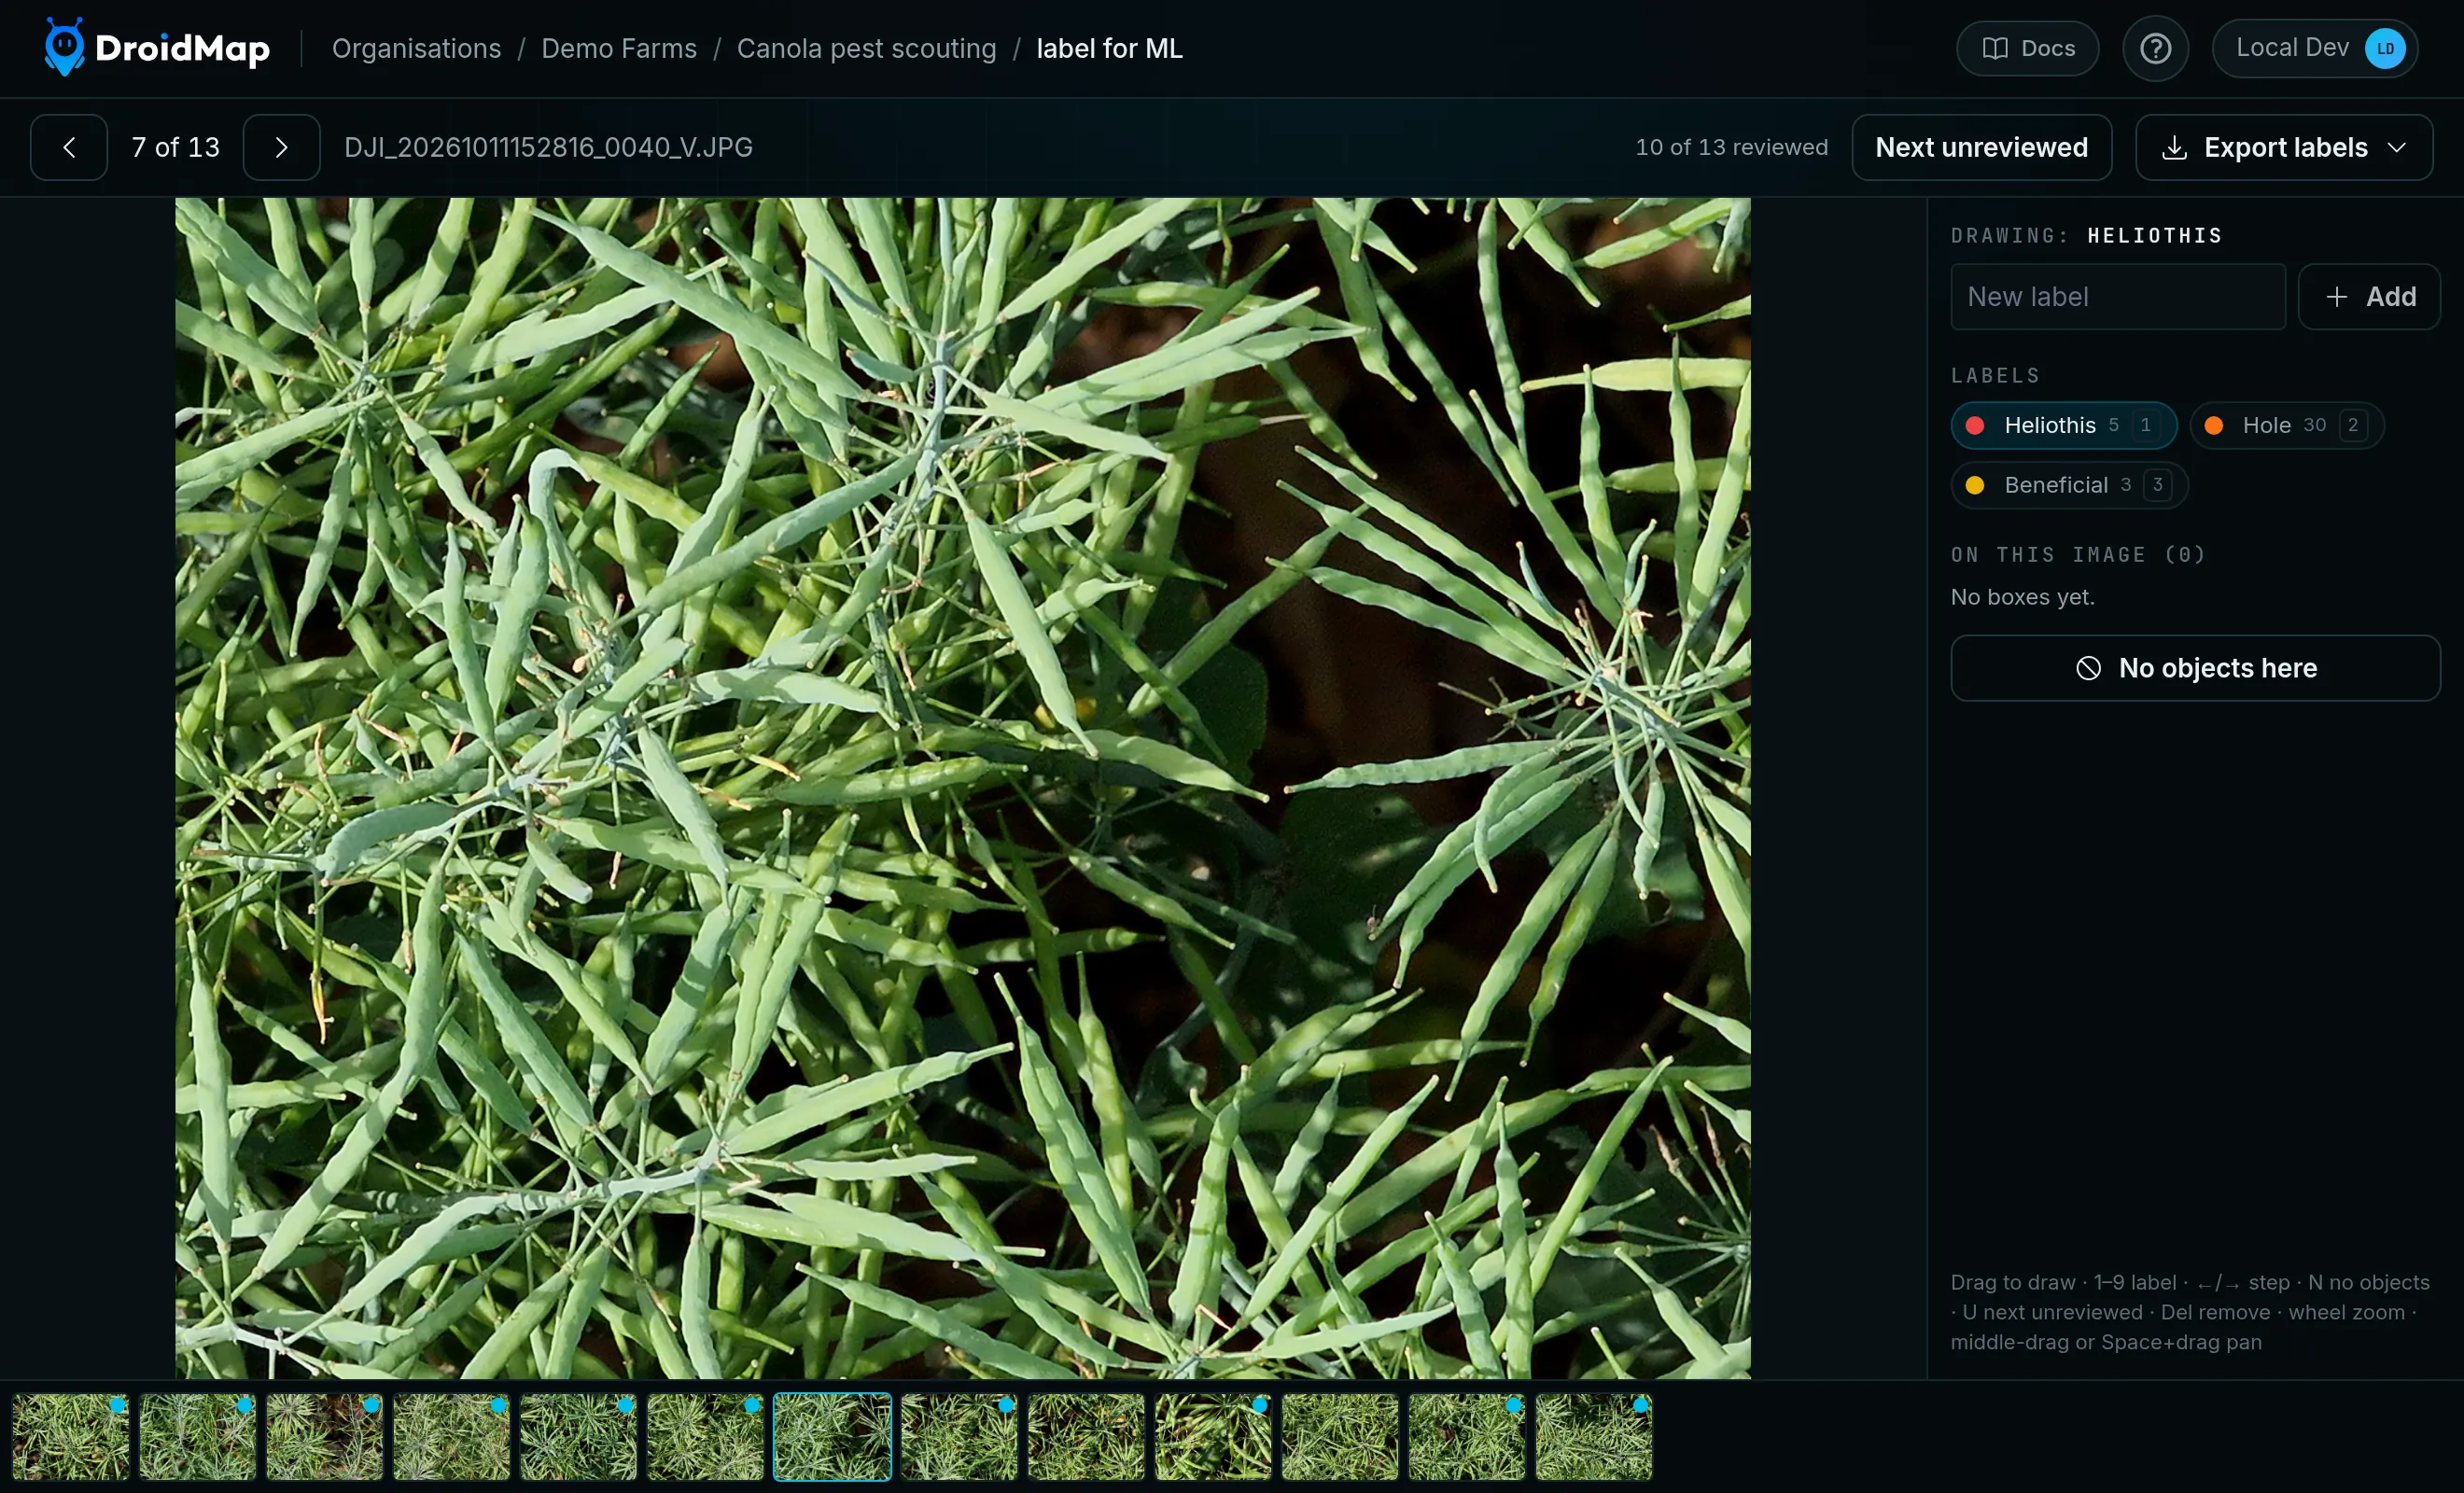
If an image has nothing to label, click No objects here or press N. This counts the image as reviewed and takes you to the next unreviewed one.
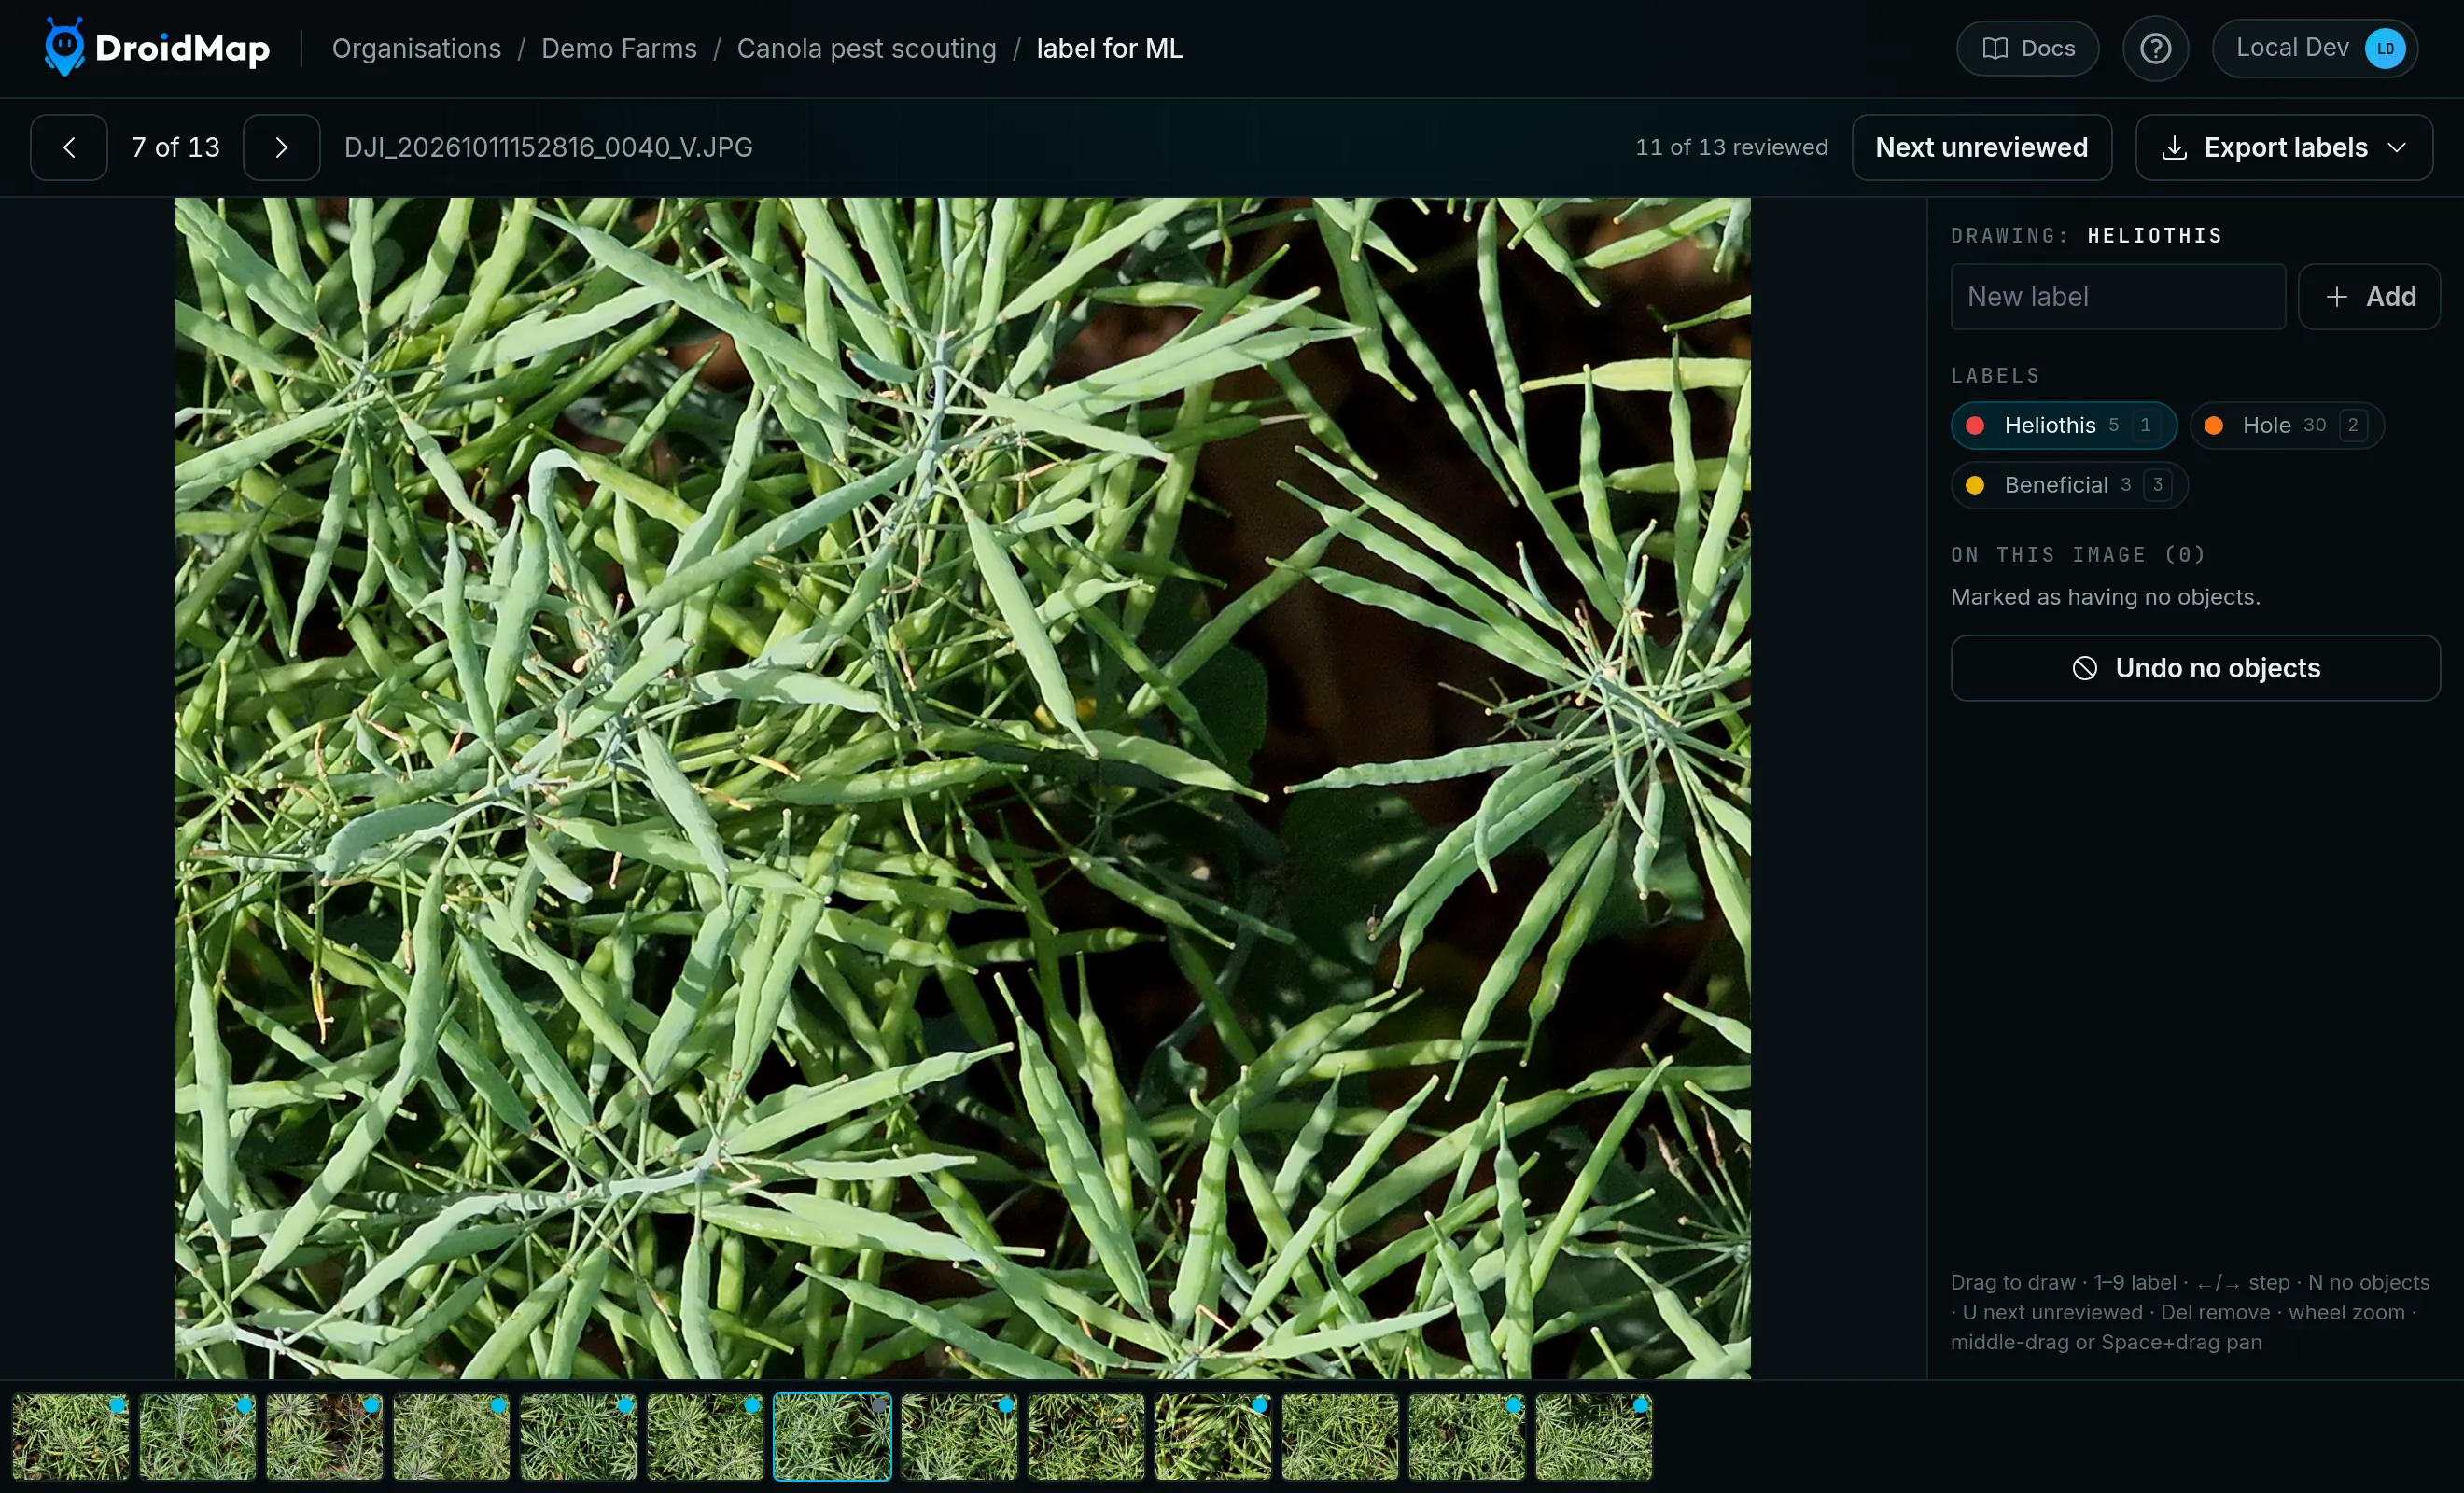
These marks matter. Images with nothing in them teach a model what to ignore, and an unmarked image is left out of your export because nobody has confirmed it is empty.
Made a mistake? Go back to the image and click Undo no objects. If you draw a box on a marked image, the mark is removed for you.
7. Move through the set
- Next or previous image: use the arrow buttons at the top, or the ← and → keys, or A and D.
- Next image still to do: click Next unreviewed or press U.
- Any image: click it in the strip along the bottom.
An image counts as reviewed once it has a box or a no objects mark. The count at the top shows your progress, and a dot on each thumbnail shows its state: blue if it has boxes, grey if it is marked as having no objects.
You can leave at any time. Your work is already saved, and the page reopens on the first image you haven't reviewed.
Change a label's colour
Click the coloured dot on a label's chip, then pick a colour, or click the eyedropper to choose any colour. This doesn't change your current label or the box you have selected.
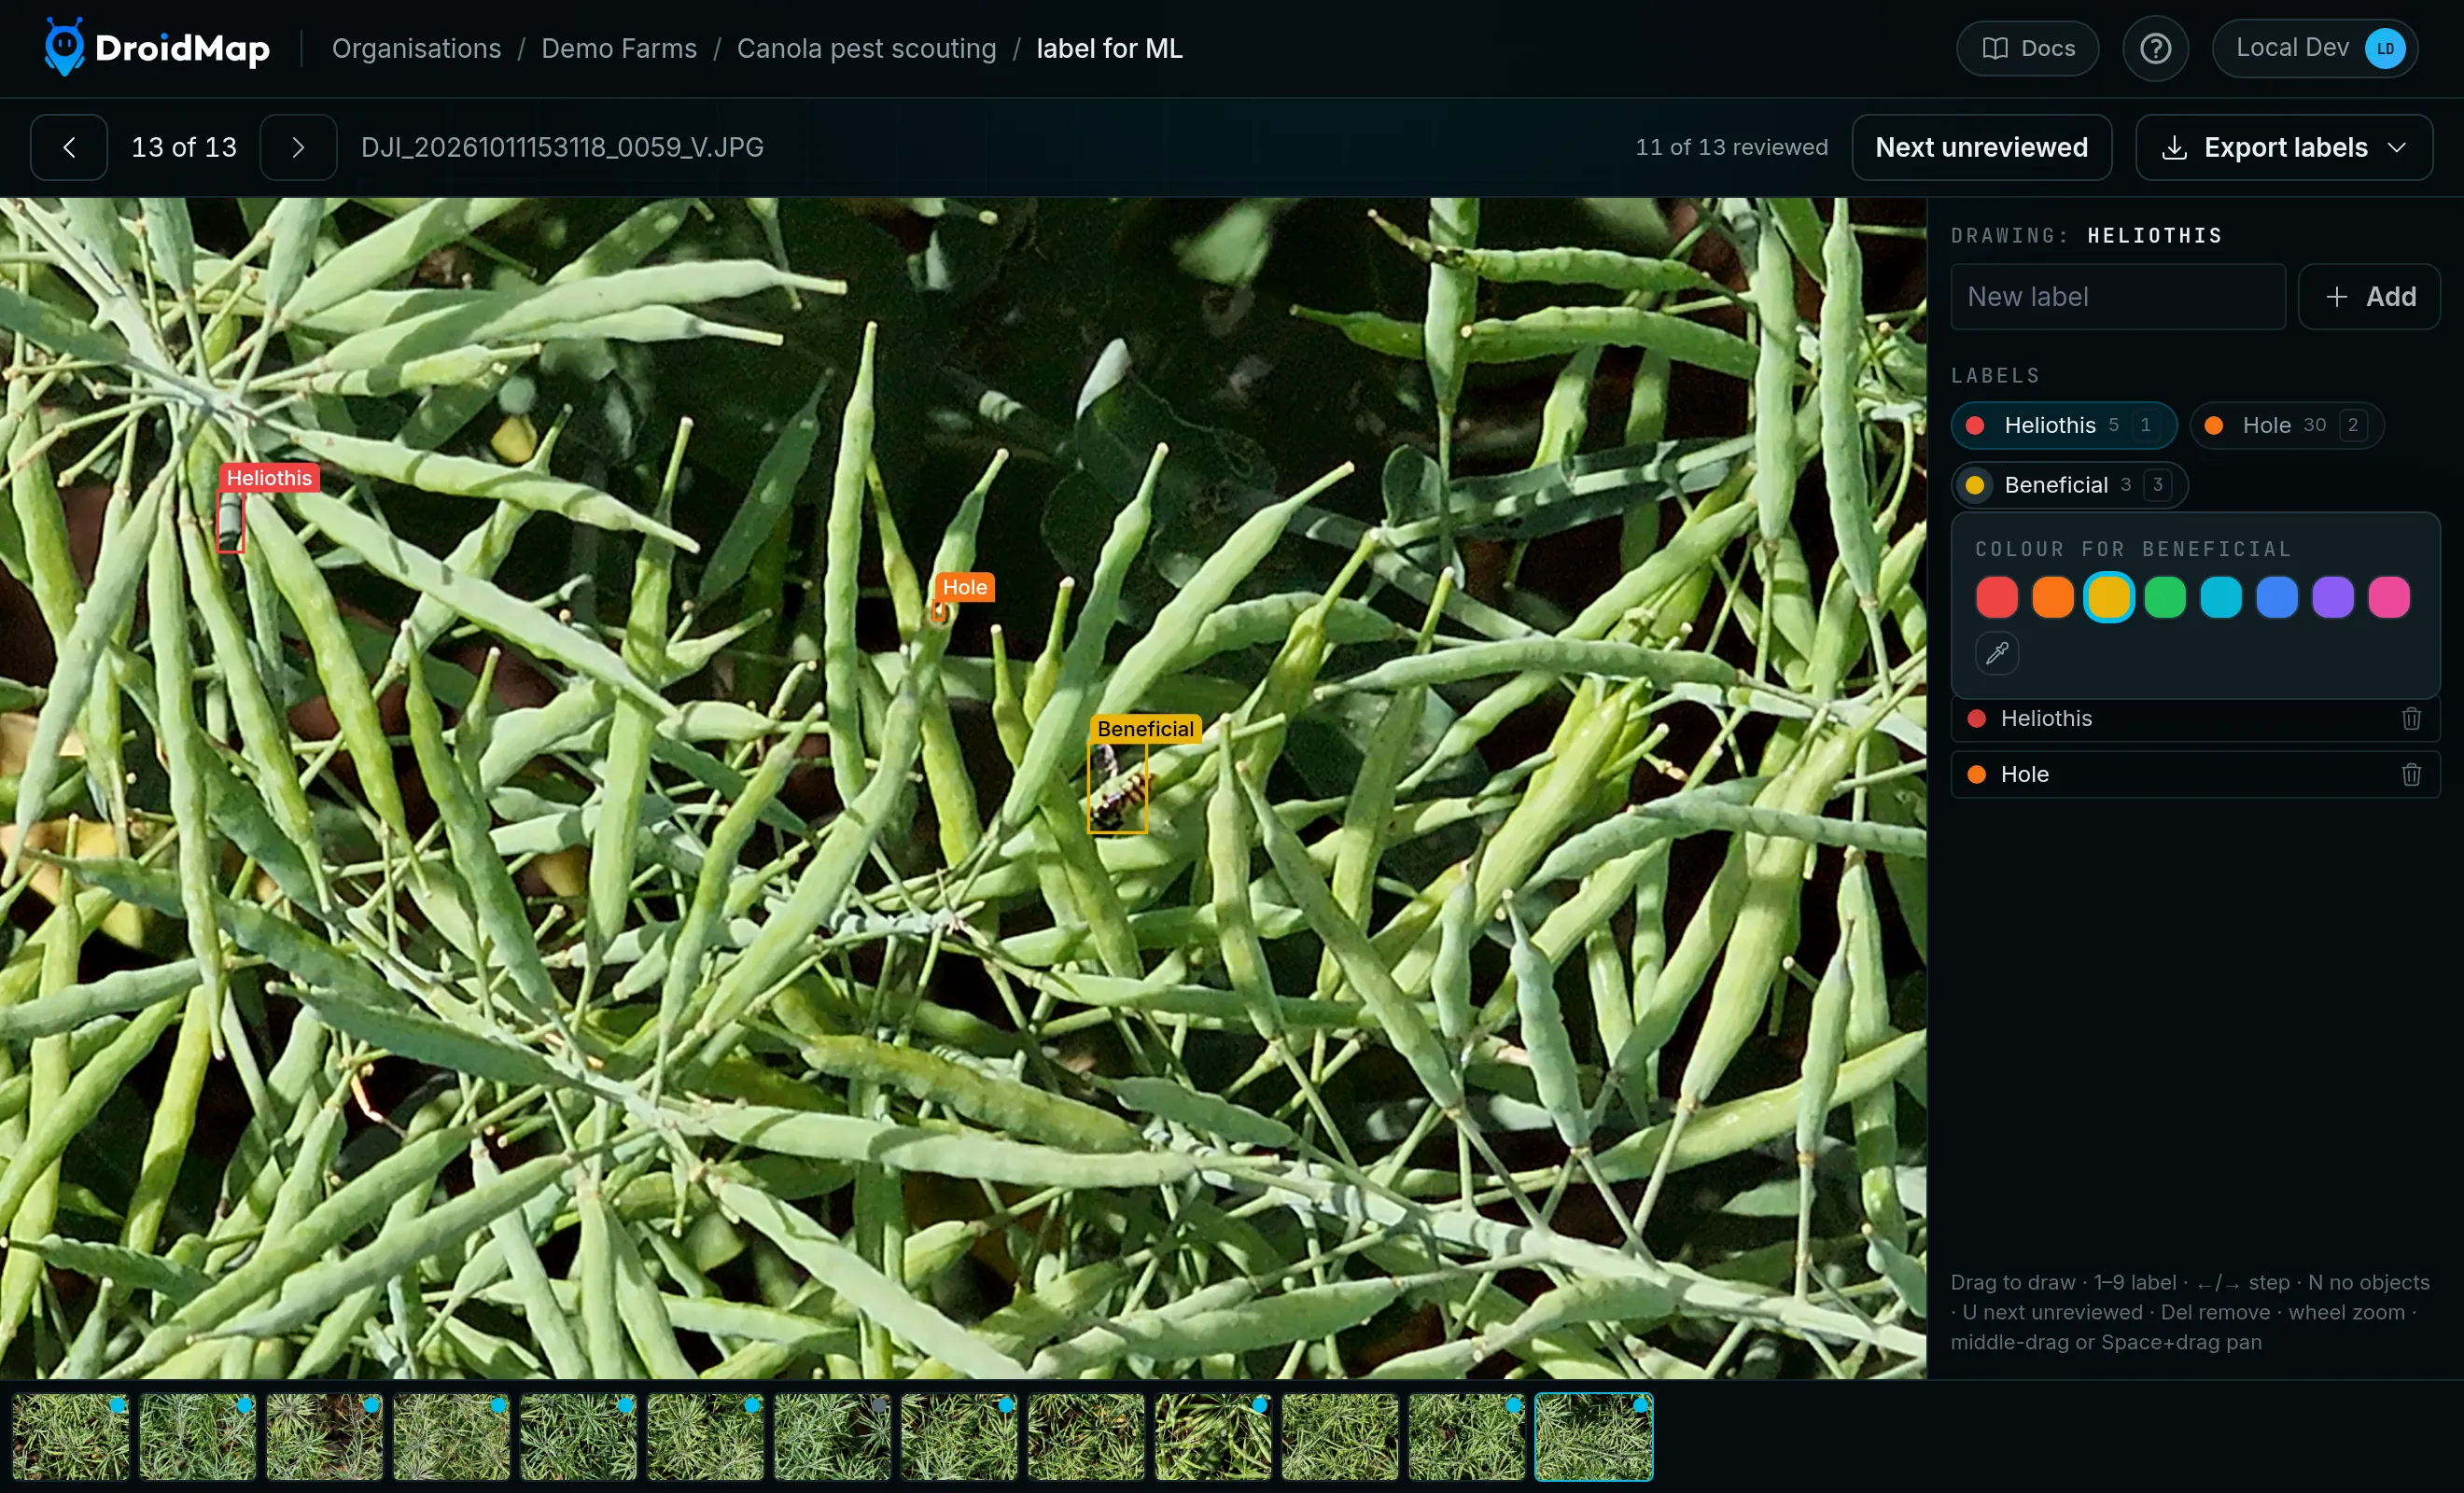
Colours are only there to make the boxes easier for you to see. They are saved in your browser for that asset set, so other people and your other devices see the default colours, and they aren't included in an export.
Keyboard shortcuts
- 1 to 9: choose a label, or relabel the selected box
- ← and →, or A and D: previous and next image
- U: next unreviewed image
- N: mark as having no objects and move on
- Delete or Backspace: delete the selected box
- Escape: deselect the box
- Mouse wheel: zoom
- Middle-drag or Space and drag: pan
Where your labels are saved
Labels are saved to DroidMap with the images in the asset set, so they are there on any device. Everyone with access to the project works on the same labels. If a colleague is labelling at the same time, reopen the page to see their boxes.
If you delete an image, its boxes are deleted with it.
Troubleshooting
A photo appears sideways. Some cameras, phones especially, store a photo one way up with a note saying how to rotate it. The labelling page shows the photo as it is stored, because that is the frame your exported boxes are measured in. Label it as shown, and see what to do in your training tool.
Dragging on the photo puts the cursor in the New label box. You haven't got a label yet. Add one first.
A label has disappeared. A label you added but haven't drawn with is forgotten when you leave the page, and so is one whose boxes have all been deleted. Add it again, spelled the same way.
The page says Your last change could not be saved. Check your connection and reload the page. Then check the image, because the last edit you made may not be there.
The page says the set has no JPEG or PNG images to label. Labelling only works on those two formats. Other files in the set are ignored.